Introduction
White bread has been a staple in kitchens for centuries. Known for its soft texture, mild flavor, and versatility, it’s perfect for sandwiches, toast, or simply enjoying with butter and jam. Making it at home not only ensures freshness but also gives you control over the ingredients, avoiding unnecessary preservatives. Homemade white bread is comforting, rewarding, and fills your home with an irresistible aroma.
Ingredients (Makes 2 Loaves)
- 5 ½ to 6 cups all-purpose flour (you may need a bit more for kneading)
- 2 ¼ teaspoons active dry yeast (1 packet)
- 2 ½ cups warm water (110–115°F / 43–46°C)
- 2 tablespoons sugar (or honey for natural sweetness)
- 1 tablespoon salt
- 2 tablespoons unsalted butter or vegetable oil
- Extra butter (for brushing loaves after baking)
Instructions
Step 1: Activate the Yeast
- In a large mixing bowl, dissolve sugar in the warm water.
- Sprinkle the yeast over the top and let it sit for 5–10 minutes until foamy. This shows the yeast is alive and active.
Step 2: Mix the Dough
- Add salt and butter/oil to the yeast mixture.
- Gradually add 4 cups of flour, stirring until smooth.
- Continue adding flour, ½ cup at a time, until the dough comes together and is slightly sticky but manageable.
Step 3: Knead the Dough
- Turn the dough onto a floured surface.
- Knead for about 8–10 minutes until smooth and elastic. (You can also use a stand mixer with a dough hook for 6–7 minutes.)
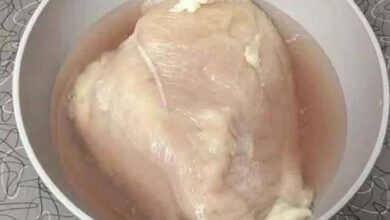
Step 4: First Rise
- Place the kneaded dough in a greased bowl, turning it once to coat.
- Cover with a damp cloth or plastic wrap.
- Let it rise in a warm place for about 1–1.5 hours, or until doubled in size.
Step 5: Shape the Loaves
- Punch down the dough to release air.
- Divide into two equal portions.
- Shape each portion into a loaf and place in greased 9×5-inch loaf pans.
Step 6: Second Rise
- Cover and let the loaves rise for another 30–40 minutes, until they rise about 1 inch above the rim of the pan.
Step 7: Bake
- Preheat oven to 375°F (190°C).
- Bake loaves for 25–30 minutes, or until golden brown and hollow-sounding when tapped.
Step 8: Finish
- Remove from pans immediately and brush tops with butter for a soft crust.
- Cool on a wire rack before slicing.
Methods
- Traditional Method: Hand-kneading on a floured surface.
- Stand Mixer Method: Using a dough hook to save time and effort.
- Bread Machine Method: Ingredients can be adapted for automatic bread machines (smaller batch).
History
White bread dates back to ancient Egypt when bakers discovered how to sift flour to remove bran and produce lighter bread. Through history, white bread became a symbol of wealth and refinement, as refined flour was more expensive. Today, it’s widely accessible and cherished for its soft, fluffy texture.
Benefits
- Homemade freshness: No preservatives, artificial additives, or excess sugar.
- Customizable: Adjust sweetness, add seeds, herbs, or garlic for variations.
- Nutritious (if enriched): Can provide carbohydrates for energy and small amounts of protein.
- Cost-effective: Cheaper than store-bought bread in the long run.
- Therapeutic: Kneading dough and smelling fresh bread is relaxing and rewarding.
Nutrition (Per Slice – approx. 1/12 of a loaf)
- Calories: ~120
- Carbohydrates: 24g
- Protein: 4g
- Fat: 1.5g
- Fiber: 1g
- Sodium: 180mg
(Values may vary depending on exact ingredients used.)
Bread Lovers
- Perfect for sandwich lovers.
- Amazing for kids’ lunchboxes.
- Great for toast lovers with butter, jam, or avocado.
- Ideal for dipping into soups, stews, and curries.
Conclusion
Classic Homemade White Bread is more than just food—it’s tradition, comfort, and creativity in one loaf. Making it yourself ensures better taste, freshness, and a sense of accomplishment. Whether you eat it warm out of the oven, toasted for breakfast, or as part of a hearty sandwich, this bread will always bring joy to your table.